New Year, New Business

Over the last few months I have been completely re-organising the business. I have streamlined things to work as efficiently as possible. The Flower Farm as you know it will now be concentrating on just two things – growing flowers and creating beautiful bespoke wedding flowers. I have an updated website, with new branding and logo, (any feedback is much apprecated).

the flower farm logo

All aspects of floristry work – bouquets, funeral flowers, demonstrations, workshops, etc will now be under a brand new business called The Flower Farm Florist. I have started this new business in partnership with my dear friend, and super florist Alison Matthews (look out for her posts in the coming months). It now means that we can offer a complete local floristry service.

We have a new website, that we hope is simple to use. Our bouquets will still concentrate of championing British products, we will use our own flowers when ever possible. They will be handmade and hand delivered, no courier’s will be used, meaning that the bouquets are delivered with care, and without any excess packaging. Each bouquet will be created as a hand-tied design, it will come in a reusable glass container (British made or recycled) with flower food and  with a British printed and designed, good quality card (Prices start at £18). Our prices will remain the same through out the year and peak periods like Valentines day, Mothers Day and Christmas.

£38 bouquet

              £38 Bouquet

Funeral flowers is an area that we haven’t really concentrated on in the past, due to time commitments, but something that we would love to build on. We are on the look out for local undertakers wanting to work with a florist that produces something different from the norm, someone who loves local produce and traditional English flowers, who wants flowers that are hand-picked and individually arranged to their requirements.

Wreath

                              Wreath

We are also planning to run a series of one day workshops, where you can watch a demonstration, create a design of your own and have a fantastic locally produced lunch. (We are looking for suitable venues to hold these.)

OLYMPUS DIGITAL CAMERA

Book Review – Vintage Wedding Flowers by Vic Brotherson

WP_20140412_003I have to say that this book is beautiful, I squealed and cooed over every page when it arrived yesterday. It has stunning photographs by Catherine Gratwicke, of Vic’s highly inspirational designs, along with amazing wording  that really sums up the different types of vintage wedding flowers available. The book covers bouquets, buttonholes, table settings, headdresses and lots more floral creations.

WP_20140412_004

Most of the designs use the traditional English flower varieties that we grow here on the farm. Flowers like sweetpeas, cornflowers, larkspur, ammi majus, dahlias, roses, cosmos, astrantia and herbs are all used throughout the book.

It is divided into six different themed chapters, each showing bouquets, table flowers and other designs that fit with the theme. The last chapter has detailed  step by step instructions to make a number of designs including a hand-tied bouquet, wired buttonhole, pomander and hair garland.

WP_20140412_005

The book explains how important flowers are to a wedding day, and how they can be incredibly personal to the bride and groom and their families. “Everyone has wonderful stories that can woven into the day through the flowers, creating a modern interpretation of a very ancient ritual.”

WP_20140412_006

I would say that this book is an absolute must have for brides looking for vintage inspiration, British flower growers, and wedding florists.

WP_20140412_007


My Favourite Flower Blogs

I love reading other people’s blogs, they really inspire me and make me feel cheerful and happy. So I thought I would post a list of my top 4 favorite flower related blogs.

www.thenaturalweddingcompany.co.uk/blog/ – This blog is written by a wonderful woman called Charlie, who runs her own website that promotes eco-friendly, vintage, seasonal style companies. The blog reflects the website, it is great for creative people looking for those personal hand-made touches for their weddings.

Charlie on her own wedding day.

www.flowerona.com – flower inspired blog that has posts almost everyday on anything flowery from florists, flower growers, flower inspired fashion to blooming lovely home furnishings. Each post has lots of beautiful photographs to really inspire you.

www.floretflowers.com/blog/ – Whenever a receive an email about a new post on this lovely blog, by American flower grower, Erin Benzakein, I let out a little squeak of excitement. I love all the beautifully written inspiring hints, tips and advice she gives about growing and arranging flowers.

ErinaboutErin Benzakein

www.misspickering.blogspot.co.uk – A very creative British florist writes this quirky and highly entertaining blog. I particularly love the shop dog posts, just brilliant! The flowers are also amazing of course.

Flower Photography

Last week, I went on a one day flower photography course at a wonderful plant nursery in rural Cheshire called Bluebell cottage gardens and nursery run by an energetic and highly enthusiastic plants woman called Sue Beesley. The course was held in her charming shed, come tea room, by the talented local photographer, Jane Burkinshaw of picture it big.
There was just four of us on the course and we all had a truly wonderful day. I was certainly more of an amateur photographer than most of those on the course, and I really did learn an enormous amount.
The morning of the course concentrated on the theory of photographing flowers and how to set up your SLR camera correctly, Jane’s way of presenting was really interesting and terms used, were described in an easy to understand way. After a really delicious lunch provided by Sue, we went outside to use our own cameras, and snap away in Sues stunning garden.
Here are some of the pictures I took.
OLYMPUS DIGITAL CAMERA

OLYMPUS DIGITAL CAMERA

OLYMPUS DIGITAL CAMERA

OLYMPUS DIGITAL CAMERA

OLYMPUS DIGITAL CAMERA

OLYMPUS DIGITAL CAMERA
The course ran from 10am until 4pm and cost £52 for RHS members, slightly more for non-members and that included lunch, it was great value in my opinion.
If you fancy taking this course yourself, there are a couple more dates this summer, for more details take a look at Sue’s website http://www.bluebellcottage.co.uk/events.

My pinterest page

This month I have become a little bit addicted to pinterest.com. If you haven’t heard of the site before., it basically allows you to store together in one place photographs from your own collection, or that you have found elsewhere on the internet.

I love collecting together photographs and pictures of things that inspire me, and this website gave me the opportunity to put everything together. If you want to have a look at my collections of flower related inspiration take a look at www.pinterest.com/clareashcroft

         A snapshot of my pinterest page

Tools for Cutting and Arranging Flowers

Tools and Materials

When you first start to take in interest in floral design it can be baffling as to what equipment you need. Well, let me tell you, the essential items are

a good sharp pen knife

a pair of scissors

and some floral foam

That is it, everything else is not essential, as you can use everyday containers from around your home to make great arrangements without the need to buy specialist bowls and vases.

If you do want to enhance your tool kit, there is a wide range of other equipment available, but most items are only useful occasionally.

Wire cutters

Secateurs

String – strong, but not too thick

Reel wire – available in black for binding plant materials and coloured for more decorative work

Stub wires – sometimes referred to as florist wire, available in different thicknesses

Coloured aluminium wire – for use in modern designs

Florist tape – for securing floral foam into containers

Buttonhole tape – for covering wires and stems when making wired designs

A tool box – handy for keeping all your floral design things together in one place

Cold glue- runny cold glue is used in many modern floral design techniques

Glue gun and glue sticks – useful for more ‘heavy duty’ gluing

Chicken wire – used in large scale designs

Posy bowls and other plastic florist dishes

Wreath rings filled with floral foam

Candle holder – this is easily secured in floral foam if you wish to add a candle to your design

The Meaning of Flowers

Today’s blog takes a look at the traditional meanings and symbolism of certain flower varieties.

Allium                                  Good fortune

Alstromeria                        Devotion and friendship

Amaryllis                             PrideMixed flower buckets

Anthurium                          Attraction

Birds of Paradise              Magnificence

Bouvardia                           Enthusiasm

Chrysanthemum              Hope

Cornflower                         Delicacy and refinement

Daffodil                               Respect / Chivalry

Dahlia                                  Good taste

Eucalyptus                          Protection

Freesia                                 calmnessvase of flowers

Gerbera                               Purity

Gladioli                                               Generosity / Natural grace

Gypsophila                         Everlasting love

Heather                               Passion

Holly                                     Good will

Hyacinth                              Consistency / young love

Hydrangea                          boastful

Iris                                          Wisdom

Ivy                                          Friendship / affection

Jasmine                               Good luck

Lavender                             Devotion

Lilac                                       First love

Lily                                         BeautySweet peas

Lily of the Valley              Sweetness / Humility

Mimosa                               Sensitivity

Orchid                                 Love / Beauty

Peony                                   Bashfulness

Phlox                                    Sweet Dreams

Primrose                             Hope

Rose Red                              Love and Passion

Rosemary                            Remembering

Stephanotis                       Desire

Sunflower                           Loyalty and power

Sweet Pea                          Lasting pleasure

Tulip                                      Hopeless love

Violet                                   Modesty and faithfulness

Zinnia                                   Absence


How to put together a Basic Hand-tied Bouquet

I have decided to add a few practical guides to my blog, for those who fancy arranging their own flowers. I am starting off with the design I get asked most, ‘how do you make it?’ the hand tied bouquet.

How to put together a Basic Hand-tied Bouquet
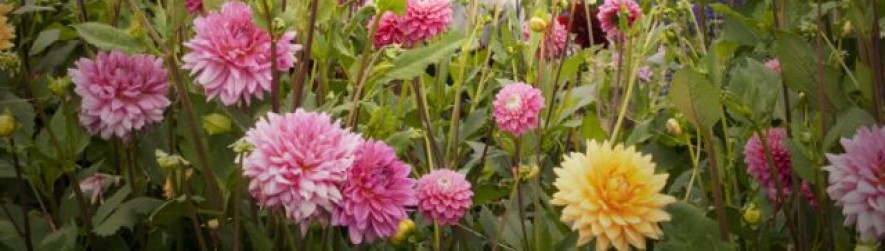
You can choose any flowers that you like, as long as they have reasonably long stems for this type of bouquet. Ideal flowers include: Lilies, Carnations, Stocks, Dahlias, Roses, Tulips & Larkspur. Ideal foliage’s could be: Eucalyptus, Salal, Euphorbia, Bupleurum etc.

What Materials do I need?
As well as your choice of flowers and foliage, you will also need a pair of scissors, some string, tape, ribbon, tissue paper and cellophane (for packaging if required).

How do I Make it?
Remove all the lower foliage from each of the stems of plant material you are using, you don’t want any foliage from the binding point (where you tie the flowers together) downwards, this is so that when in a vase, the leaves cannot rot and contaminate the water.

Next, lay out all the flowers and foliage on your table, this way you can see what you are using, and easily pick up your stems without them getting tangled together, and cut a piece of string to tie the bouquet (easier to do at this point, then when you have created your bouquet and then realise you have nothing to secure it with!)
Take the largest flower in your hand; ( whichever hand feels most comfortable)  this will form the focal point of your bouquet. Then start adding other materials in a clockwise direction, adding every flower at a slight angle towards your wrist, so as more and more plant material is added, the stems begin to spiral around each other.

Try to hold the bouquet lightly in one hand so that the materials are supported between the thumb and the forefinger, there is no need to squeeze tightly as the flowers will hold each other as the spiral develops, try to relax your hand as much as you can, this avoids cramp, as well as stopping the stems being crushed.
Keep adding flowers and foliage’s in a clockwise direction, making sure that the different types of flowers are evenly spaced throughout the bouquet, you also need to keep looking at your shape does the bouquet look circular? I good tip is to look at your bouquet in a mirror, the reflection will help you get a clearer view of your overall shape.  Plus, don’t forget to keep the stems going in the same direction. This may all sound tricky, but practice does make perfect.
Carefully tie off tightly the bouquet with the pre-cut piece of string, taking care not to lose your bouquets shape or your spiralled stems. Then you need to cut the stems to the required height , as a guide, the length of the stems below the string should be 1/3rd of the overall height of the bouquet and they also need to be all at the same level. You can test this by seeing whether the bouquet will stand up by itself.
Packaging the Bouquet
You can now either place your bouquet straight into a vase, or gift wrap it in an aqua pack (bubble of water). To do this, you need to cut two large squares of cellophane, lay one on the table and arrange a couple of sheets of tissue paper on top of it to cover most of the cellophane, then place the second sheet diagonally over the top of it to make a kind of tissue sandwich, then place the bouquet in the middle of it, led on its side and pull up one side of the cellophane to cover the bouquet and tuck it around the binding point and secure with tape.
Ensure that the top edge of the cellophane comes to the top of the bouquet, secure with extra pieces of tape if needed. To finish off, tie with a ribbon or raffia bow which should complement the colours in your bouquet, and carefully fill your bubble of cellophane with water, either by placing the bouquet under a running tap or by using a watering can without a rose head attached, aim the water into the center of the bouquet and take care that the water level does not come higher than the binding point.OLYMPUS DIGITAL CAMERAThis photograph shows 4 bridesmaids hand tied posies, each bound with a piece of ribbon and a broach supplied by the bride.

A hand tied bouquet wrapped in simple brown paper

A hand tied bouquet wrapped in simple brown paper

Grouped hand tied bouquets of Tulips and Daffodils

New ways to get in touch

These last few weeks whilst the weather hasn’t been fit to get out on the flower field, I have been busy expanding my online presence, and getting to grips with social media. If you are into face book or twitter I now have a page on each, I would really appreciate if you would take a moment to take a look, and let me know what you think.

http://www.facebook.com/ClareAshcroftFloralDesign

http://www.twitter.com/the_flower_farm

I have also discovered a great site called pinterest, where I have put together, a collection of photographs that really inspire me,almost like a virtual scrapbook. I think this is a great tool for brides to use, to put together a theme for their weddings. You can see mine at http://www.pinterest.com/clareashcroft